Buying an action camera can be such an overwhelming and frustrating experience. Especially if you are being introduced with this technology for the first time.
You watched plenty of YouTube videos. Hell, you even read few articles. Everyone seams to recommend different camera. Bombed with information all over the place, you are confused. Which camera to buy? Which one is the best? You want the best bang for your buck, that’s not a secret.
I know how you feel.
I was on the same road not long ago. There are hundreds of choices to be made.
So, how can you chose the best action cam? Who to trust?
Answer is yourself. You are the only one making a decision here. You are the only person on the planet who knows what is the best for you. Ignore marketers, You Tubers and social media influences
Only by learning and understanding your needs can you truly choose “the best” action cam for yourself. In this guide, I’d like to introduce you with a basic process through which buyer goes when purchasing an action camera regardless of it’s price and features. No matter if you’re just starting out, or you’re an advanced user, I hope this guide will help you.
Without further ado, let’s begin.
Start with the budget
Yeah, yeah. What else were you expecting? Like any other buying guide, this one starts with a budget in mind.
It is very important that you determine the amount of money you are willing to spend on an action cam. With a clear budget in mind you will filter out cameras that you can’t afford or the ones that are too cheap for you. 
Trust me, you do not want to start a research without the budget. You’ll loose precious time looking at wrong models.
I understand. It’s not always that you can’t spend 500$ on an action camera. You might have the money. But you won’t use camera often, hence you just think it wouldn’t be money well spent. And that’s perfectly fine.
From financial and pricing aspect, there are 4 groups of action cameras on:
- Extremely tight budget <50$
- Tight budget 50-100$
- Mid-range budget 100-200$
- High-end budget 200$+
Extremely tight and tight budget
Even if you have plenty of cash to spend, my personal recommendation for newbies is to start small. For up to 100$ you can find bunch of cameras that will help you understand what is an action camera, how it works and things you can do and can’t do with it.
Mid-range budget and higher-end
In my personal experience, once you get your first cheap camera, you will soon break it or realize there is a feature you really want and it does not offer it. Of course there are people who bought a cheap camera and it works, does the job well, so they have no need to invest further.
After their first encounter with action cameras, some users realize their first camera works well, they barely use it, and when they use it it provides decent results and meets their expectations and needs.
The other part breaks their camera, starts swearing the technology and starts talking about good old days when all products were mechanical.
Higher end action cameras
The third part of users are people ready to move forward. They familiarized themselves with a concept of an action camera. They bought their first one that was a good experience, but they want to take their videos to the next level.
Those users are considered an experienced action camera users and provided that they have the financial possibility they usually go for a more expensive cameras.
Depending on your financial status, determine the maximum amount of money you are willing to spend on your first or the next action camera.
Okay, assuming that you determined your budget. We can move to another important factor – video quality.
| Tier | Typical capability | Best for |
|---|---|---|
| Under $50 | 1080p, fixed focus, no stabilisation, bundled housing | Finding out whether you will use one at all |
| $50–100 | Usable 1080p/60, basic electronic stabilisation, decent housing | A genuine first camera; survives being learned on |
| $100–200 | Real 4K, better sensor, competent stabilisation, external mic input | Footage you intend to edit and publish |
| $200 and up | Large sensor, strong stabilisation, high bitrate, flat profiles | Work you are being judged on |
Video Quality
Regarded as the most important feature of any video camera, the quality of a video will certainly be in your top 3 priorities when choosing an action camera. So how does one inspect the quality of a clip?
Most people just type “Camera XYZ video sample” into a YouTube. Let me tell you right away, while watching samples from websites like Vimeo or YouTube seems like a logical thing to do, the most reliable way to actually see the footage quality is to try to find downloadable samples.
Why? Because streaming websites always compress quality of a video. YouTube is especially known for calibrating uploaded videos in a weird way.
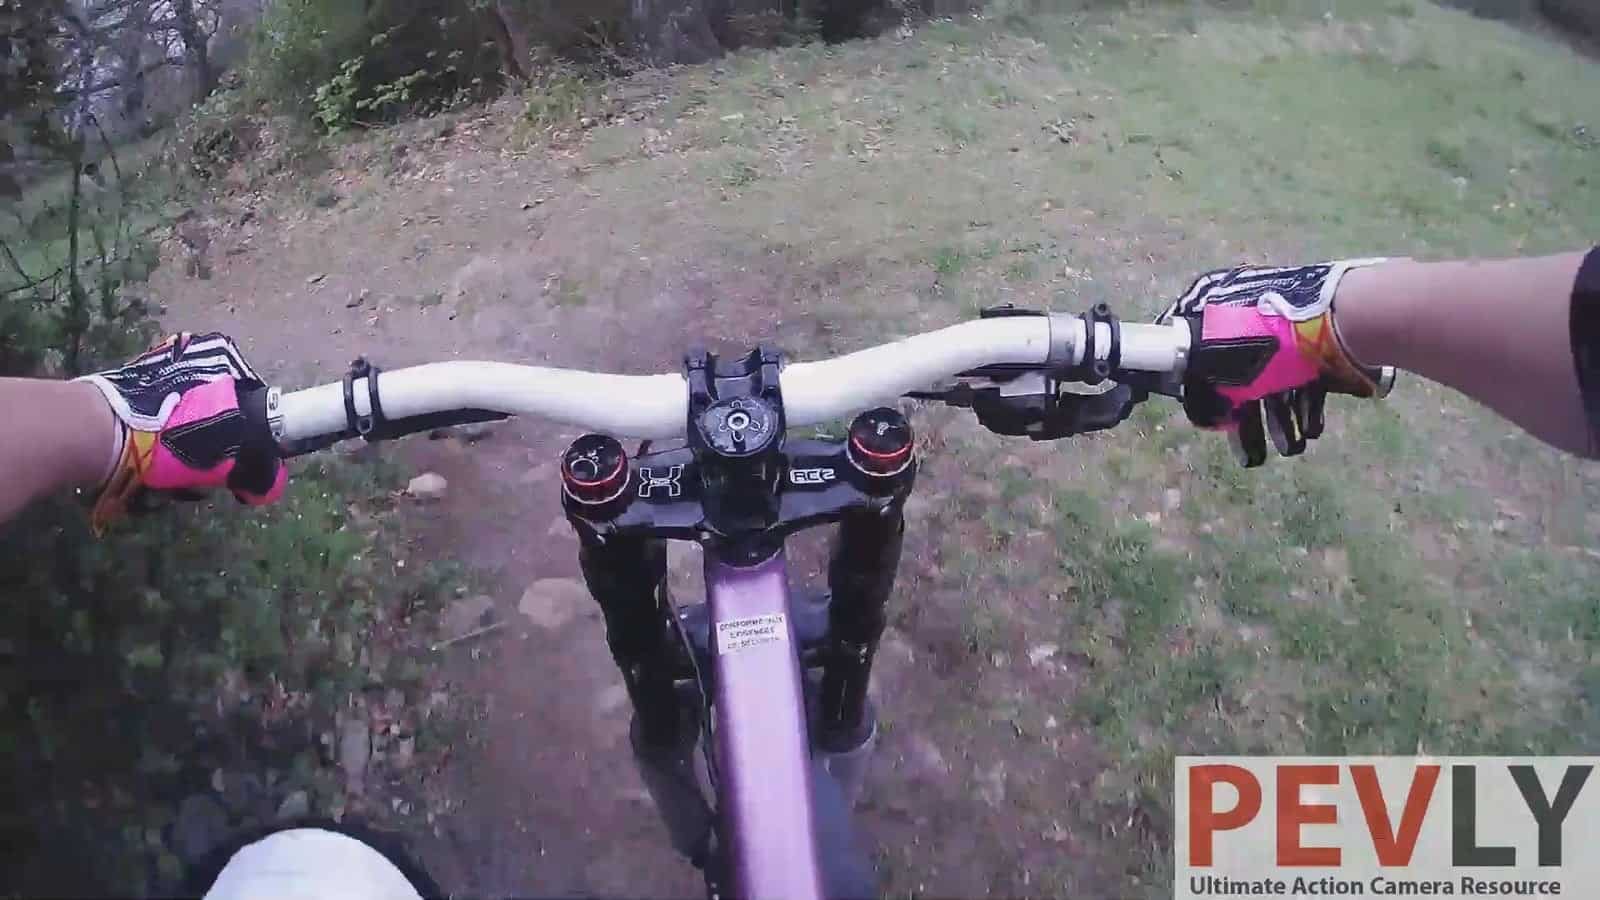
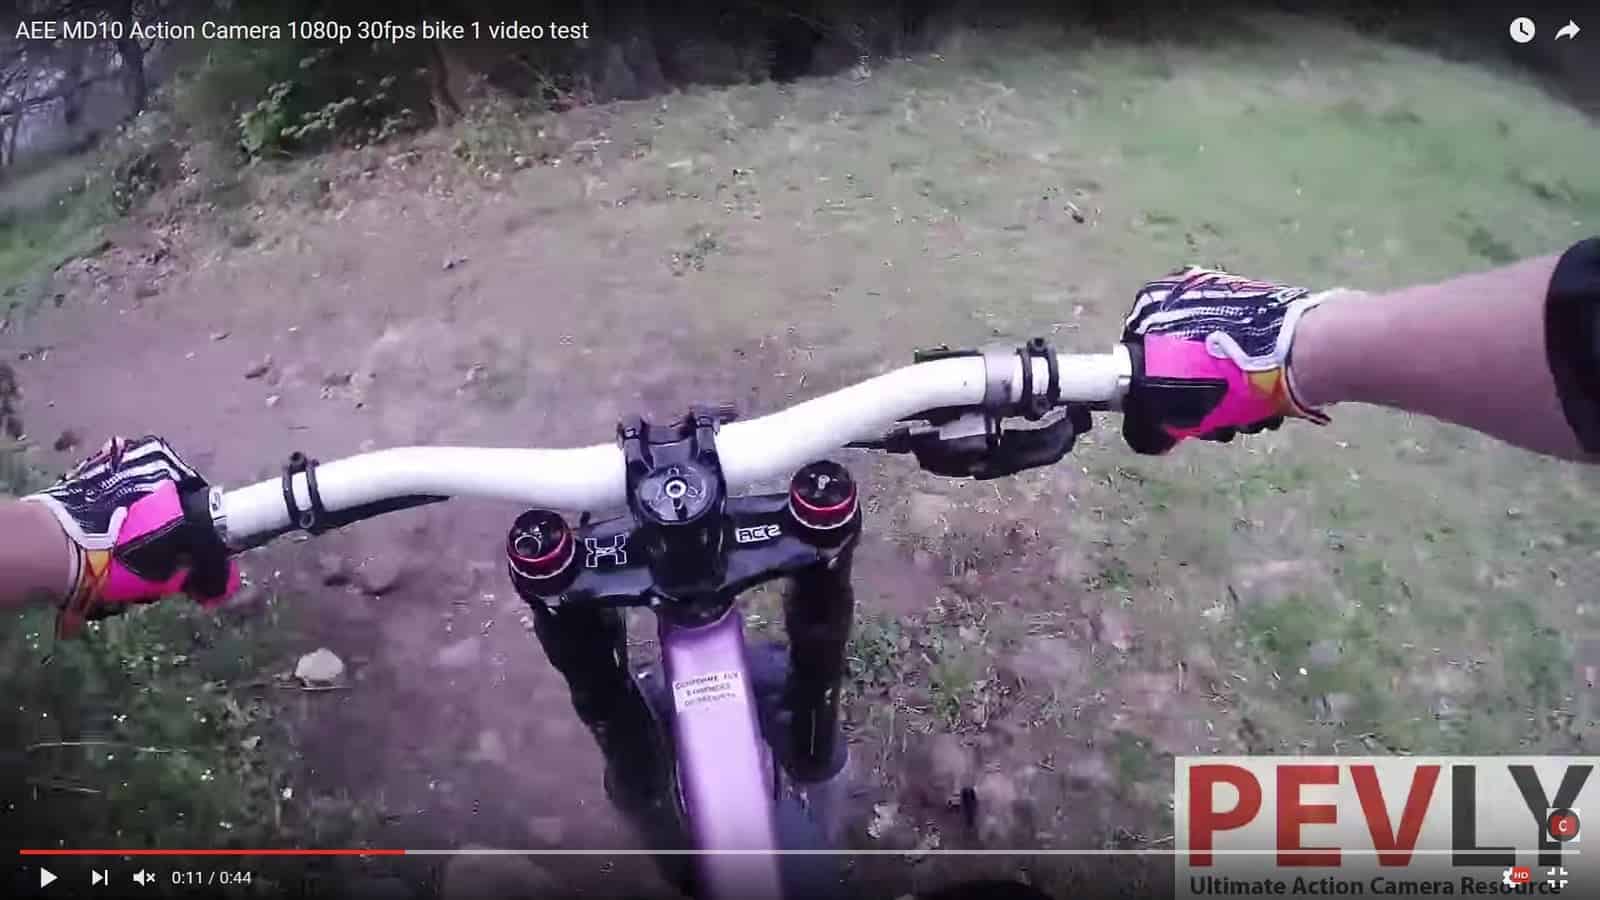
That’s why the best thing to do in order to inspect the video quality of any camera is to find a downloadable, unedited video sample, download it and watch it on your own PC. To be more precise, I personally encourage people to download VLC software (Windows link | iOS link |, since this one really works well and is able to play most of the video formats without any issues.
For instance, on our website, we always offer unedited video samples which people can get, for all the action camera we review. If you are having a trouble finding an unedited (raw) sample, you can post a request of plenty of online forums where owners of that particular camera happily provide few short videos. My recommendations are aerial photography section of RCGroup Forum, and DashCamForum. There are probably few more online communities similar to the mentioned duo, so feel free to do your own research and let me know if you have any other reliable website.
It would be good if you can preview movies recorder in different situations and various light conditions (For instance, low-light, night footage, direct sunlight, etc). Assuming you downloaded the VLC, while watching the sample, feel free to pause the video and closely inspect the paused frame. Make sure that the sharpness is satisfying, that there isn’t too much glare under the direct sunlight or that you can see objects at night.
To summarize it’s extremely important that you download unedited, raw sample and preview it on your own computer via reliable player, such as VLC. Under no circumstances should you judge video quality based on a video uploaded on any sort of a streaming website, since those sites compress quality and lower bit-rate, making the video look blocky. If you can’t find a downloadable sample, either ask manufacturer support to send you one or ask for help on online forums. Pay special attention to video colors, stabilization, sharpness and low-light performance while evaluating a sample.
Photo quality
Process of inspecting an image quality of an action camera is quite similar to video quality checkup. Simply, you should find an uncompressed, unedited, original, straight from the camera image sample and preview it on your PC. Images that websites (including ours) place online are compressed in order to load faster on the web. Therefore, it is once again recommended to find an unedited JPEG or RAW image of the camera you are interested in.
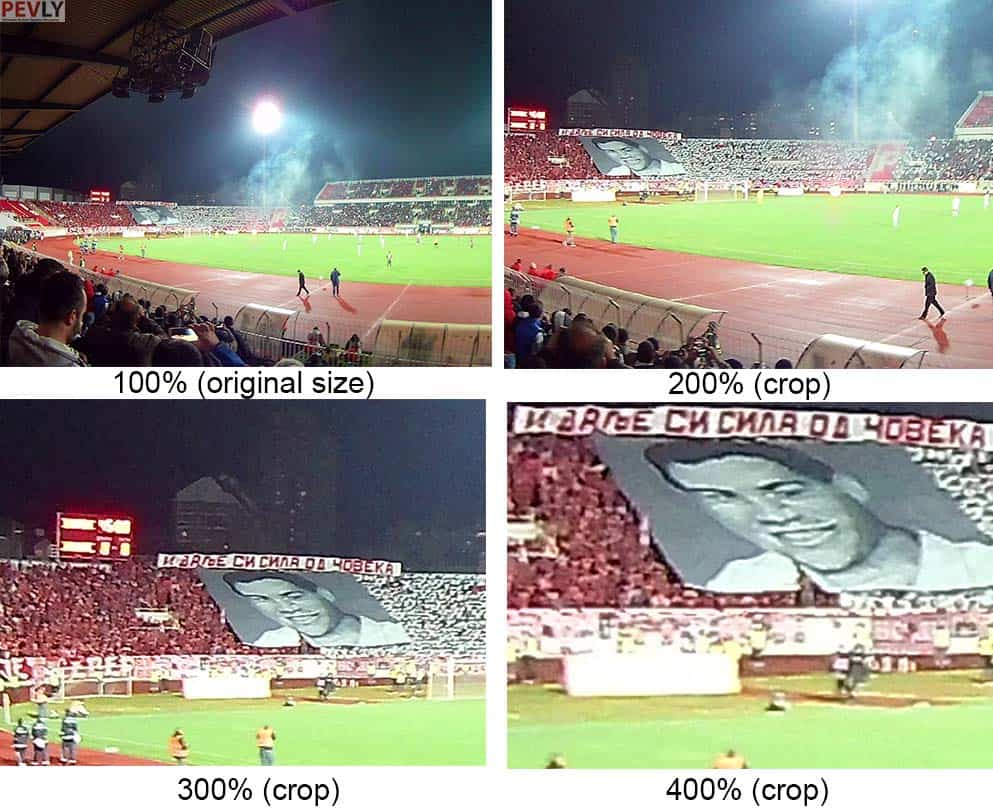
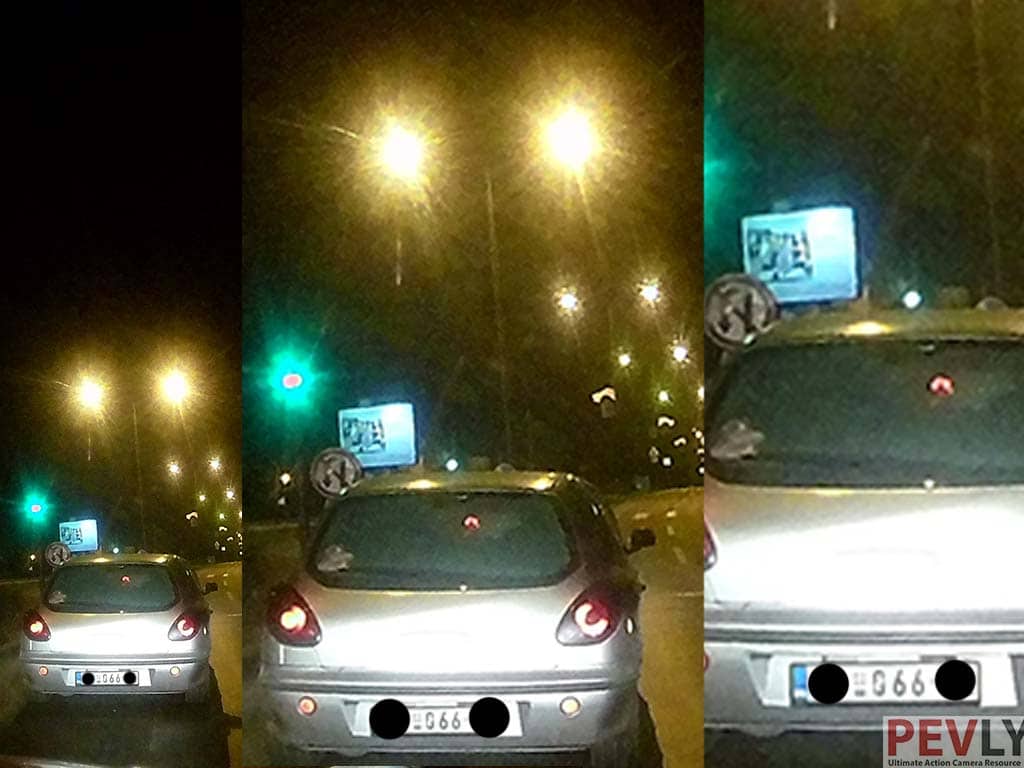
Since action cameras have fixed-focus lens, the first thing that you should look at is sharpness. Is the image clear enough even when zoomed in for 2x-4x times? If you’re satisfied with a result, pay attention to colors. Are they natural, vivid or over-saturated? Also make sure to find a sample that shows image quality under a direct sun-light and at night. If you really want to go crazy, check if there are too many dead, white pixels in low-light.



Audio quality
Similar to images and video, in order to evaluate the audio quality you’ll need to find either unedited video or separate sound files. First recommendation is to put your headphones or earphones on while playing back the video. That’s the best way to hear if the sound is muffled or too low. Try to find samples which show someone playing a music instrument or simply a person talking into a camera.
You should also be aware that most low-budget cameras do not have a perfect sound. In most cases they are not good for extremely loud music or concerts, as their microphones are just not that high-quality.
If the audio quality is really important (for instance you are a guitarist, pianist, vlogger, or just an audio-freak), I recommend that you look for a camera which supports an external microphone. Those kind of cameras are in mid and high-end range, but you get what you pay for. External mic is a must if you need good sound and want to use an action camera while doing any sort of physical activity.
One additional possibility (especially if the camera you are interested in, does not support external mic) is that you use an external voice recorder and merge the video with the recorded audio in video-editing software. Since iPhone has decent enough mic, you can also record the sound with a smartphone. However these ways of recording a sound are too robust for being used in action or in an extreme situation, they are on the other hand quite OK for concert and celebration recording.
The details that get overlooked
For most action camera buyers it’s the quality of videos, photos and sound along with the price that matter most. But what happens when you like two or three cameras at nearly the same price? What makes a camera very good instead of just okay?
Often it’s the details. There are many aspects of a camera’s operation beyond navigating menus and adjusting settings. These have to do with the camera body, batteries, memory cards, cables and AC adapters and other accessories. The following lists some of the details you might want to consider.
You can decide whether or not they’re important to you and figure them into your purchase decision accordingly. Individually certain items don’t cost much, but buying numerous items to get what you want or need can add up. If your budget is tight you’ll need to decide what’s essential and what you can do without.
Camera Body
Form Factor – Action cameras come in many different shapes but they’re always small in size. Probably the most common shape is what I call “matchbox”. These cameras are rectangular and look like miniature point-and-shoot digital cameras. Another popular shape is the “breadloaf”, flat on the bottom, curved on the top and rectangular when viewed from the side. Recently cube cameras have become more popular. They’re shaped like – you guessed it – a cube! Tubes of various lengths and diameters are also common. There are others as well and some cameras are shaped for specific applications. You can decide which form factor best suits your needs.
Surface texture – Some camera bodies have a knobby texture that’s good for sweaty or wet hands. Others have a rubbery, easy-to-grip surface. Some pick up dirt and dust more easily than others and some are more readily cleaned.
Buttons – All action cameras use buttons. You use them all the time for navigating menus, snapping photos and starting/stopping recording so buttons can make your experience with a camera pleasant or annoying. Check to see if they’re comfortably located for your hands. Are they easy to find by touch without looking? Is the resistance firm but smooth when you press down on them? Do they have a definite, refined click or an unrefined clack?
Battery compartment – The battery compartment can be located in a variety of positions on the camera body. The most common locations are the side and bottom and sometimes the back. Side and bottom locations have narrow doors while back-mounted batteries have squarish doors. I prefer the side location because if the door should inadvertently pop open the battery won’t automatically fall out. I also prefer doors that remain attached to the camera when you open them. This is especially important for bottom-mounted batteries because if you lose the door there’s nothing to hold in the battery. Also some doors can be a bit fiddly to open and close.
Ports – The memory card slot and ports for cable connections are almost universally located on the side of the camera for “matchbox” style camera bodies. The location varies for other camera shapes and sizes. Except for cameras with a splash-proof design these openings usually aren’t covered. A few manufacturers include a dust cover for the opening. I think this is a good idea because it keeps out dirt and moisture.
Tripod mount – Some action cameras have a 1/4”-20 (that’s a quarter-inch with 20 threads per inch) threaded opening on the bottom of the camera body for mounting on a tripod. Others have a simple clip with a threaded connection and the clip attaches to the camera. But some cameras have neither. For those the only alternative is to use the waterproof housing with the appropriate mounting accessories – if a waterproof housing is available. Holding the camera with your bare hands for a long time such as at sporting events instead of using a tripod, monopod or even a simple pistol grip can be a real pain – literally if you have joint or muscle pain in your arms or hands.
Display – Many action cameras don’t have a display. That’s especially true of tube or “lipstick” cameras and others that are mounted to helmets. For those that do, size matters. The two most common sizes are 1-1/2- and 2-inches (measured diagonally). You’ll appreciate the larger size if your vision isn’t too good. A few 2-inch displays are touch screens which some people prefer for navigating menus. The brightness and quality of the display can vary from so-so to pretty good.
WiFi – WiFi is a common feature on action cameras. Not all cameras have WiFi but it’s certainly widespread, even among cheap cameras. WiFi allows your camera to communicate with an application installed on your mobile device such as a smartphone or tablet. The app is proprietary and will only work with a specific brand and your particular camera. With the app you can see the live view from the camera and you can start/stop recording and snap photos using your device. The app allows you to change a variety of camera settings on your device rather than at the camera. Though the entire camera menu might not be available on the app the most commonly used settings will be there. WiFi can be a great feature in some circumstances. It’s much easier to align a camera on your helmet, surfboard or snowboard using the app. And because mobile devices have larger screens it’s easier to set up your camera to frame your shots just right.
External hardware and memory
Cables – Essentially all action cameras include the USB cable needed for charging the battery and transferring files. A few cameras with an HDMI output also include the HDMI cable. Cables are cheap and widely available. Don’t let the exclusion of certain cables influence your purchase.
AC adapter – There has been a recent trend to exclude the AC adapter from camera packages. For some shoppers this will be a blessing – they have plenty of adapters from their mobile devices. Others need the adapter and consider its absence to be a cheap move by the manufacturer. You can decide if you need one but even if you do and your preferred camera lacks one, adapters are pretty cheap and widely available.
A note of caution about adapters – For US-spec cameras that include an AC adapter, look for the Underwriters Laboratory (UL) symbol on the box and the adapter itself. Although a UL listing is not mandatory it does offer assurance that there is a near-zero chance the adapter is faulty. I know of at least two non-UL listed US-spec adapters that severely overheated and in one case began emitting smoke. That is a fire hazard you don’t want at home, work or anyplace else.
Spare batteries and external charging docks – Battery operating times can be quite short for action cameras depending on the settings – ranging from 50 minutes to 2-1/2 hours or so – and the battery recharging times are long – from 2-1/2 to 5 hours. Therefore some people consider spare batteries to be essential. If you do then you’ll want an external charging dock as well. A few action cameras include one or two spare batteries and the external charger. Most have them available as an option. Just a few action cameras have non-replaceable batteries. Nearly all the batteries are proprietary. Almost no action cameras use standard battery sizes like AA or AAA. Sometimes spare batteries can get relatively pricey because they’re proprietary. You’ll have to decide if you want them and how it affects your budget. A cheap and versatile option is to buy a USB power bank instead. Most cameras and power banks are compatible.
Memory cards – Nearly all action cameras use some version of a microSD card for their memory. Very few have internal memory only. Some cameras can only handle a maximum of 16GB of memory (microSD). Most can handle 32 GB (microSDHC) and some can handle 64GB or even 128GB (both called microSDXC). Most manufacturers specify that the card should be at least Class 10 (a measure of the data writing speed) and should be a name brand – no off-brands or generics. A few camera makers include a memory card with their camera. But sometimes cameras misbehave even when you’re using the right memory card so there’s no way to know if the card or the camera is defective without trying a different name-brand card. Memory cards aren’t too expensive so don’t worry if your preferred camera is packaged without one.
Global positioning system – Some of the higher-end action cameras have built in GPS,which enables you to geo-tag your photos and videos and also show the entire you hiking or running path that overlays the video. While this feature sounds like tons of fun, make sure to think whether or not you’ll really be using it, as GPS usually increases the final price by large.
Mounting accessories and other stuff
Waterproof housing – A few action cameras are splash-proof or waterproof to a shallow depth on their own without a waterproof housing. Some cameras aren’t intended for underwater use. But most action cameras are intended for such use and require mounting in a separate waterproof housing to do so. Most manufacturers include the housing even in their basic packages but there are a few that don’t. Among accessories this can be one of the more expensive ones so if you need it, be sure to check if the camera you’re interested in includes one or if it’s available separately and how much it costs.
Mounting accessories – Nearly all action cameras come with at least a few mounting accessories and some cameras are packaged with a good number and variety of them. Other than a camera clip or the waterproof housing, mounting accessories are rarely proprietary. Even when they’re marketed as specially designed for a certain brand they’re usually usable across a variety of cameras. That’s because most mounting accessories are compatible with GoPro-style accessories. These are based on the design of GoPro camera accessories and are ubiquitous in the action camera marketplace. Many shapes, sizes and varieties can be found on virtually any website that sells photography accessories. Because they’re cheap and readily available, you shouldn’t let the lack of a few particular pieces influence your purchase decision.
Support and manuals – Forget about using support as a criteria in your buying decision. It isn’t that it’s unimportant, it’s just impossible to predict. Time and again on many review websites I’ve read about poor to utterly non-existent product support. With one manufacturer I was as likely to get a wrong answer as a right answer. With few exceptions you should assume that you’ll be on your own to figure things out. Usually the manufacturer’s manual (especially with the Chinese cameras) isn’t much help either. Typically they’re printed in illegibly small fonts and the English translation doesn’t make sense. I had one manual that described some other camera.
Warranty – Some manufacturers state that their camera has a one year warranty and spell out the terms and conditions, but often there’s no warranty information at all. How you deal with a defective camera depends on who you bought it from and where you’re located. If you’re in the US and buy from a US retailer, whether bricks-and-mortar or online, you can usually return the camera during a limited period of time – typically 30 days but sometimes up to 90 – after which you must deal directly with the manufacturer. That can be a hassle because almost all manufacturers are in China. Returning a camera for repair or replacement can take months and you’ll have to pay for shipping at least one way. If you’re in the UK and buy from a UK seller then you’re entitled to certain warranty rights for a period of six years. If you’re in the EU and buy from an EU seller your warranty rights extend for two years. But no matter where you are, if you buy from an online Chinese seller or directly from the manufacturer and your camera goes bad then you run into the problems I described above for US buyers. In the end it’s often cheaper to simply replace a broken camera rather than pursue repair or replacement under warranty.
Seller bundles and extras – Some retailers offer a bundle of accessories when you purchase an action camera. Sometimes these can be a good value, especially if they include things like spare batteries or a memory card. Others include lots of stuff you don’t want or need. They can also be a hit-or-miss proposition because you can’t be sure of their quality. Bundles and other extras might help you choose a retailer but don’t let them affect your basic choice of camera.
The camera does not tell the story
At the end of the day, no matter which action cameras you end up purchasing, do not ever forget that creating videos and photos is an art. People will not watch your videos because of all the cool effects and gear you have. They will watch it because of the story.
The emotions which your video sparks are way more important. Even if you are not professional. Let’s say you are making a holiday video. Instead of just joining clips together, create a story that will remind you how much fun you had.
Instead of focusing too much on the technical stuff and specification, just get a camera that suits most of your needs. Perfect product does not exist. If it’s close to perfect it is pricey. Instead of waiting 2 months researching online on which camera creates such and such video, spend half of that time planning your video and the other half outdoors, creating stories.
People often over-think on what to get. They do insane amount of research and get disappointed at the end, because they are seeking for perfection for as little cash as possible. Of course, I am not saying you shouldn’t do a research at all. But stop wasting your time with technical stuff you do not need and want to understand.
Anyway, I really hope this guide helped you. If you have any further questions or a suggestion to improve it, please let me know. I would gladly reply to your questions and implement your suggestions into this guide.